
Table of Contents
Introduction
If you are trying to import checks into QuickBooks Online, the first thing to know is this: QuickBooks Online handles check activity differently than many users expect. You can import cleared check activity through bank feeds or bank file uploads, but that does not always create a full QuickBooks Check form.
This matters because a check in QuickBooks is more than a bank withdrawal. A proper Check transaction includes the bank account, payee, category or item details, memo, date, and amount. If you import the wrong way, you can easily create duplicates, post expenses to the wrong account, or make your bank reconciliation harder.
In this guide, I will show you how to import checks into QuickBooks Online safely, when to use bank uploads, when to match existing checks, and what to do if you need true batch check entry.
Quick Answer
QuickBooks Online does not provide a universal built-in tool that imports full Check forms from a CSV file in every plan. The most common method is to upload bank transactions, then review, categorize, match, or exclude the check-related withdrawals.
If the checks already exist in QuickBooks, do not add the uploaded transactions again. Match them instead. If you need to create many actual Check transactions, QuickBooks Online Advanced may offer batch transaction tools in some companies, or you may need an approved third-party import app.
| Goal | Best Method | Result |
|---|---|---|
| Import cleared check activity | Bank feed or CSV bank upload | Withdrawals appear in the bank review screen |
| Record checks already written | Create checks manually or use batch tools if available | Full Check transactions post to the bank account |
| Avoid duplicates | Match imported withdrawals to existing checks | One transaction appears in the books |
| Import printable check forms | Use supported batch tools or third-party app | Check forms may be created depending on the tool |
What Is How to Import Checks into QuickBooks Online?
Importing checks into QuickBooks Online means bringing check-related payment activity into your company file so your bank account, expenses, vendors, and reports stay accurate.
There are two common meanings. First, you may want to import bank-cleared checks from your bank statement. These usually come into QuickBooks as withdrawals from a checking account. Second, you may want to create actual QuickBooks Check transactions in bulk. Those transactions work like checks entered from the + New button and can include a payee, expense category, product or service item, class, location, and memo.
Businesses use this process when moving from another accounting system, catching up old bookkeeping, cleaning up a bank account, or entering a large batch of checks. The right method depends on whether you need a bank activity record or a full check form.
Why It Matters
Importing check data correctly saves time because you avoid entering every check by hand. For companies with dozens or hundreds of checks, this can reduce hours of bookkeeping work.
Accuracy is the bigger reason. If you add uploaded bank withdrawals when matching was needed, expenses can be doubled. If you categorize checks to the wrong account, profit and loss reports become unreliable.
Compliance also matters. Clean check records support tax preparation, audit trails, vendor history, and bank reconciliations. When checks are recorded with the right payee and category, you can explain payments more easily.
Reporting improves too. Proper check coding helps you see spending by vendor, account, class, project, or location. That makes management reports more useful.
Finally, productivity increases because your team can review transactions in batches, apply bank rules, and focus on exceptions instead of repetitive data entry.
Requirements Before You Begin
Before you import checks into QuickBooks Online, prepare the file, permissions, and accounting setup. A few minutes of preparation can prevent a messy cleanup later.
| Requirement | Why It Matters | What to Check |
|---|---|---|
| QuickBooks permissions | You need access to banking and transactions | Use an admin or user with bookkeeping rights |
| Correct bank account | Checks reduce a specific checking account | Confirm the account in the Chart of Accounts |
| Bank file or statement | Provides check dates and amounts | Use CSV, QBO, OFX, QFX, or supported formats |
| Payee list | Helps categorize vendor payments correctly | Clean duplicate vendor names before importing |
| Expense categories | Controls financial reporting | Review the Chart of Accounts |
| Existing checks | Prevents duplicate entries | Search the register before adding uploaded items |
If you are migrating from QuickBooks Desktop, remember that Desktop supports different tools, including IIF imports and Accountant batch entry in certain editions. QuickBooks Online does not work exactly the same way.
Things to Prepare
Use this checklist before starting the import:
- CSV or supported bank file with check withdrawals
- Copy of the bank statement for the same period
- QuickBooks Online user permissions
- Correct checking account in the Chart of Accounts
- Vendor list reviewed for duplicates
- Customer or project names if checks are billable
- Classes and locations if your company uses them
- Expense categories confirmed with your accountant
- List of checks already entered in QuickBooks
- Backup export or reports saved before major cleanup work
QuickBooks Online does not have a traditional full-file backup button in most plans, so export key reports before large changes. Save the bank register, Profit and Loss, Balance Sheet, and reconciliation reports if available.
Step-by-Step Guide
Step 1: Decide What Type of Check Import You Need
Why: The correct process depends on your goal. Importing cleared bank activity is not the same as creating full Check forms.
How: Do these checks already exist in QuickBooks? If yes, you should match them to uploaded bank withdrawals. If no, decide whether bank categorization is enough or whether you need detailed Check transactions with payees and line details.
Expected result: You know whether to use bank upload, manual check entry, batch transactions, or a third-party import tool.
Step 2: Review the Checking Account Setup
Why: Every check reduces a bank account. If you import into the wrong account, your reconciliation will not match the statement.
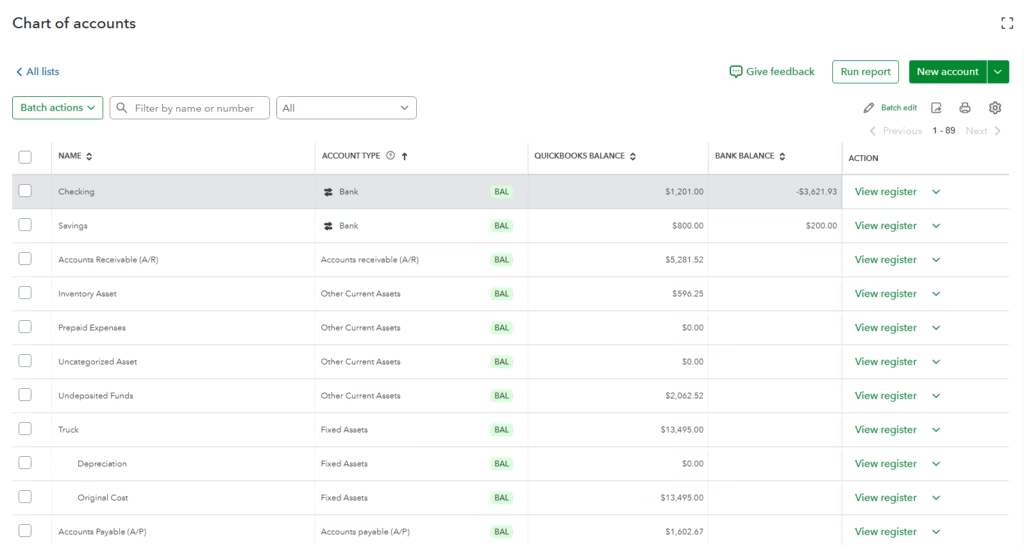
How: Go to the Chart of Accounts and confirm the checking account name, account type, and opening balance. If you have multiple bank accounts, compare the last four digits or account nickname.
Expected result: The checking account is ready to receive imported or matched transactions.
Step 3: Prepare the Bank File
Why: QuickBooks needs clean data. Extra columns, reversed amounts, or incorrect dates can cause import problems.
How: Download the transaction file from your bank. If using CSV, keep the file simple. Common columns include date, description, and amount. Some banks use separate debit and credit columns. For checks, the amount should appear as money leaving the bank.
Expected result: You have a clean file containing the check withdrawals for the correct date range.
Step 4: Upload Bank Transactions into QuickBooks Online
Why: Uploading bank activity places check withdrawals into the bank review area. They do not affect your books until you add, match, or exclude them.
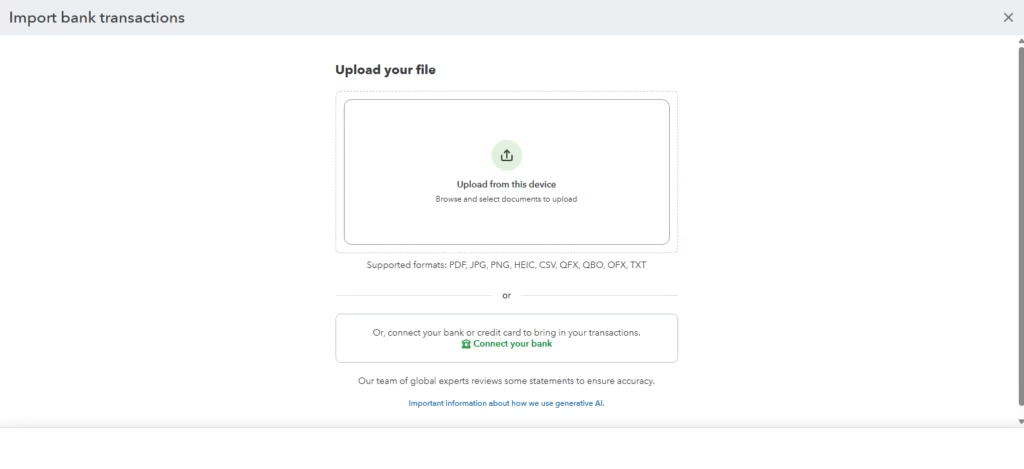
How: Open Transactions, then choose Bank transactions. Select the bank account, then choose the option to upload transactions if the account is not connected or if you need to import an older period. Follow the prompts to select your file, map the date and amount fields, and confirm the upload.
Expected result: The imported checks appear in the For Review tab as bank withdrawals.
Step 5: Review Each Uploaded Check Withdrawal
Why: Imported bank transactions are not automatically perfect. The bank description may not identify the vendor, and QuickBooks may guess the wrong category.
How: Open each transaction in the For Review tab. Check the date, amount, payee, and category. If the description says only a check number, use the bank statement, check image, or payment records to identify the vendor.
Expected result: Each withdrawal is ready to be added, matched, or excluded correctly.
Step 6: Match Existing Checks Instead of Adding Them Again
Why: This is the most important duplicate-prevention step. If a check already exists in QuickBooks and you add the bank withdrawal as a new expense, the payment is counted twice.
How: When QuickBooks finds a possible match, review it carefully. Confirm the amount, date, payee, and bank account. Select Match only when the uploaded withdrawal represents the same check already recorded in QuickBooks.
Expected result: The bank withdrawal connects to the existing check, and no duplicate expense is created.
Step 7: Add New Check Activity When No Match Exists
Why: If the check was never recorded, adding the bank withdrawal creates the accounting entry needed for reports and reconciliation.
How: In the For Review tab, choose a payee and category. Add a memo if needed, especially if the bank description includes a check number. If your company tracks classes, locations, or customers, fill those fields before adding.
Expected result: QuickBooks records the transaction in the bank register as an expense-type transaction from the checking account. It may not be a printable Check form, but it will reduce the bank balance and post to the selected category.
Step 8: Exclude Transactions That Do Not Belong
Why: Sometimes a file includes dates already reconciled, duplicate bank feed items, or transactions from the wrong account. Adding them will damage your books.
How: Select the transaction and choose Exclude. Excluded items move out of the active review list. Use this carefully and document why the transaction was excluded.
Expected result: Unneeded transactions do not post to your books.
Step 9: Use Batch Transaction Tools If Available
Why: If you need true Check transactions in bulk, bank upload may not be enough.
How: In QuickBooks Online Advanced, check whether batch transaction entry is available in your company. Feature availability can vary. If available, use it to enter multiple transactions faster. Review every row before saving.
Expected result: Multiple transactions are entered more efficiently than manual one-by-one entry.
Step 10: Consider a Third-Party Import App for Full Check Forms
Why: Some businesses need to import historical checks with detailed line items, classes, locations, and vendor names. A specialized import app may handle this better than bank upload.
How: Choose a reputable QuickBooks Online app that supports Check transactions. Test a small sample first. Confirm how the app maps bank accounts, payees, expense accounts, items, classes, and locations.
Expected result: You can create detailed check records in bulk, if the app supports the required fields.
Step 11: Reconcile the Bank Account
Why: Reconciliation proves that QuickBooks agrees with the bank statement. It is the final check on your import work.
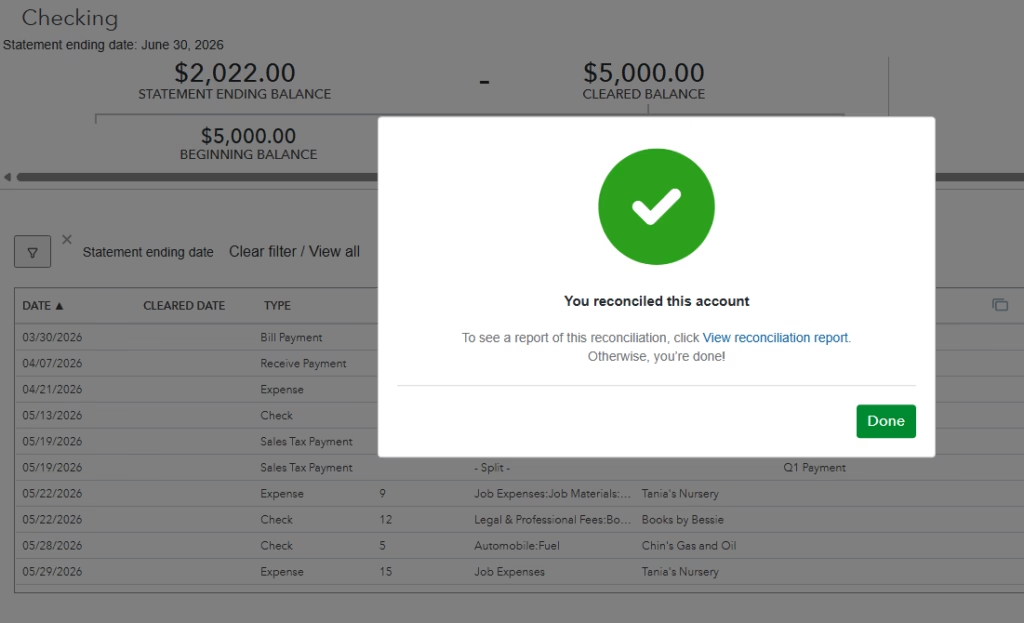
How: Go to the reconciliation screen, enter the statement ending date and ending balance, then compare cleared checks against the statement. Investigate differences before finishing.
Expected result: The difference is zero, and the checking account is reliable for reporting.
Verification Checklist
| Check | How to Verify | Expected Result |
|---|---|---|
| Correct bank account | Open the bank register | Checks appear in the intended checking account |
| No duplicate checks | Search by amount, date, and check number | Only one transaction exists per check |
| Payees assigned | Review the transaction list | Vendor names appear where known |
| Categories correct | Run a Profit and Loss report | Expenses appear in proper accounts |
| Matches completed | Check the bank review tab | Existing checks are matched, not added again |
| Bank reconciles | Complete reconciliation | Difference equals zero |
Common Problems
| Problem | Cause | Solution |
|---|---|---|
| Duplicate expenses | Uploaded withdrawals were added instead of matched | Undo the added transaction and match to the existing check |
| Wrong bank balance | Transactions imported to the wrong account | Move or delete incorrect entries and re-import to the correct account |
| CSV will not upload | File format, date format, or amount columns are incorrect | Simplify the file and remap fields during upload |
| Vendor names missing | Bank file only shows check numbers | Use bank images or check register records to identify payees |
| Reports look incorrect | Checks posted to wrong categories | Reclassify transactions after reviewing the Chart of Accounts |
| No full Check form created | Bank uploads create bank activity, not always Check forms | Use manual entry, batch tools, or a supported import app |
Common Mistakes
One common mistake is assuming every imported bank withdrawal becomes a QuickBooks Check. In many cases, it becomes an expense or bank transaction record instead. That may be fine for bookkeeping, but it is not the same as a check form.
Another mistake is importing too much history at once. If you upload a full year without checking what already exists, duplicates can spread quickly. Work month by month when possible.
Beginners also rely too heavily on QuickBooks suggestions. The suggested payee or category can be wrong, especially when bank descriptions are vague. Review before saving.
Finally, do not reconcile before cleaning up duplicates. Reconciliation becomes harder when the bank register contains extra transactions.
Best Practices
- Start with a small batch. Test one week or one month before importing a larger file. This helps you catch mapping problems early.
- Match before adding. Always search for existing checks. Matching protects your expense totals and bank balance.
- Use consistent vendor names. Clean vendor duplicates so reporting stays organized.
- Keep check numbers in the memo field. This makes research easier when the bank file does not provide full payee details.
- Reconcile after each import period. Reconciliation confirms the import worked correctly.
- Document exclusions. If you exclude transactions, keep notes so another user understands the reason later.
Frequently Asked Questions
Can I import checks into QuickBooks Online directly from Excel?
QuickBooks Online does not offer a standard Excel import for full Check forms in every plan. You can usually import bank transactions from CSV, then review and categorize the withdrawals.
Will a bank upload create printable checks?
No, not usually. A bank upload brings in cleared bank activity. It records withdrawals after review, but it does not necessarily create printable QuickBooks Check forms.
What is the safest way to avoid duplicate checks?
Match uploaded bank withdrawals to checks already entered in QuickBooks. Do not add an imported withdrawal if the original check transaction already exists.
Can QuickBooks Online Advanced import checks in batch?
QuickBooks Online Advanced may include batch transaction tools when available in your company. Check your subscription features and test carefully before entering a large batch.
What file format should I use for bank check activity?
Common supported formats include CSV and bank download formats such as QBO, OFX, or QFX, depending on the upload option available in your QuickBooks company.
Why do my imported checks show only check numbers?
Many banks provide limited descriptions for cleared checks. You may need bank check images, your old register, or vendor payment records to identify the payee.
Can I import checks from QuickBooks Desktop to QuickBooks Online?
You can convert Desktop data to Online, but transaction handling depends on the conversion method and file condition. Desktop tools such as IIF imports do not work the same way in QuickBooks Online.
Should I add or match imported check withdrawals?
Match if the check already exists in QuickBooks. Add only when the payment has not been recorded yet.
Can I undo imported bank transactions?
Yes, many bank feed actions can be undone from categorized transactions, but cleanup can still be time-consuming. Review carefully before adding large batches.
Do I need an accountant to import checks?
Not always. Simple bank uploads are manageable for many users. If you are importing historical data, fixing duplicates, or converting systems, expert help is recommended.
Key Takeaways
- QuickBooks Online does not provide a universal built-in check form import tool for all plans.
- Bank uploads can import cleared check activity as withdrawals.
- Uploaded bank transactions must be reviewed before they affect your books.
- Match existing checks instead of adding duplicates.
- Use batch tools or a third-party app if you need full Check transactions in bulk.
- Reconcile the bank account after importing to confirm accuracy.
Conclusion
The best way to import checks into QuickBooks Online depends on what you are trying to accomplish. If you only need cleared check activity from the bank, a bank upload may be enough. If you need full Check forms with detailed payees and line items, you may need batch entry tools, manual entry, or a specialized import app.
The most important rule is simple: review before posting. Match existing checks, add only missing transactions, and reconcile after each import period. That approach keeps your bank balance clean and your financial reports dependable.
Need Expert Help with QuickBooks?
Databrax can help you import checks into QuickBooks Online the right way. Our QuickBooks specialists assist with Data Migration, Bulk Imports, Cleanup, Error Resolution, Reporting, and Ongoing Support so your books stay accurate and ready for decisions.